Here’s one way to accomplish this task.
In order to Route audio to the stage floor, you need to create a ‘Foldback’ signal, also referred to as a ‘mix-minus’. It’s called this because it is your MIX, minus the microphones on the stage. If those mics were sent back to the stage, feedback could occur, and that’s not nice! Also, because this isn’t necessarily what you want to broadcast or record, this really is a sub-mix.
* Starting on the left side of the audio console, select the channel(s) which you want to send to the stage floor speaker.
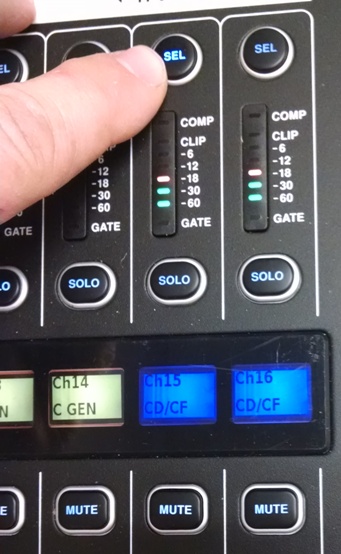
1) First select the audio channel(s) that you want to send to the stage floor speaker. Channels 15/16 are paired, so you only have to select one of them.
In this example, it’s the CD / compact flash player.
Make sure your source is playing, and you have meter movement on the audio channel, as in the picture.

2) Now, look at the LCD screen. The channel you have selected will appear in the upper left corner. With the arrow tabs to the bottom right of the screen, tab over to the ‘sends’ tab.
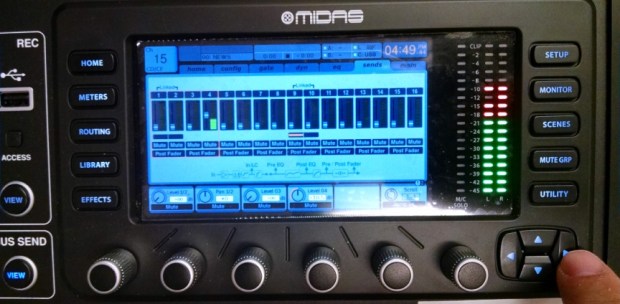 Under the ‘sends’ tab you will have a representation of the 16 Mixbus faders. Notice the thin red line around the first four virtual faders/meters, and the virtual knobs on the screen below those, and rotary encoders below those. The rotary encoders below the virtual knobs adjust the audio level for faders 1 through 4. Turn the 4th knob clockwise, and you will see the virtual fader #4 move up and the virtual knob #4 will turn. Audio level LED’s should be represented as well. Set your level at about + 1 dB. The dB indicator is in the ‘box’ with the virtual knob. Now you will have signal on Bus 4, and also Matrix 4 (not seen here), which is what we want.
Now, navigate back to the ‘Home’ tab by selecting the ‘HOME’ button on the top left of the LCD screen.
3) Notice near the bottom of the LCD window, is an area called DCAs 1 through 8. Channel 15 is assigned to DCA 8. DCA stands for Digitally Controlled Amplifier. This is a way to group several channels together, which gives the grouped channels a virtual Master fader – a way to control volume of several faders at once -without a physical output.
So, if you had the CD/CF player, and the Video Server as sources for the Stage Foldback, the volume to both can be adjusted by one fader – DCA 8 – without affecting what you are recording or broadcasting. For example, in live TV, the studio personnel could hear the commercials playing, and be alert that the commercial break is about to end, and they will be back on-air in moments. 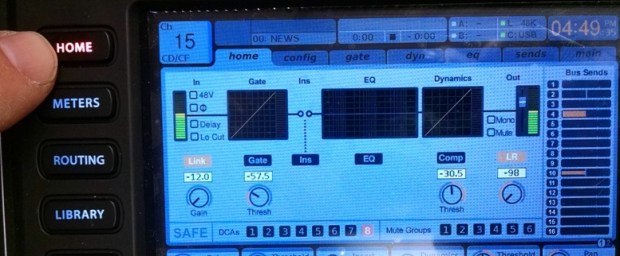
4) (Above image) The DCA which is glowing red, will be the DCA that you must fade up in order for your sound to get to the stage floor speaker. Make note of which DCA is assigned to the audio Channel which you are trying to send to the stage floor speakers (DCA 8 in this case). Notice on the RIGHT side of the LCD screen the 16 Bus Sends representing audio levels to them. Bus 4, which also is Matrix 4, has audio level, which is what we want.

- Select Matrix/Main C layer, then push up the fader for Matrix 4 (aka ‘pot it up’. ‘Pot is an abbreviation of ‘potentiometer’, a resistive electrical device.)

Matrix 4 becomes your ‘Master fader’ adjusting audio level to the Stage Floor amp and speaker.
